I recommend reading this article after reading the article below.
As I said in the previous article, the second reason I tried to migrate the existing blog to a blogger was cumbersome writing. In the case of Jekyll, to build a blog, you need Ruby and Jekyll installed on Windows, Linux, or Mac. Let’s imagine The image of myself sipping coffee in a beautiful and secluded cafe. He took out his laptop to write a blog post, but he was bewildered because Ruby and Jekyll were not installed. To make matters worse, there was no internet, so I took out my cell phone and tethered it.
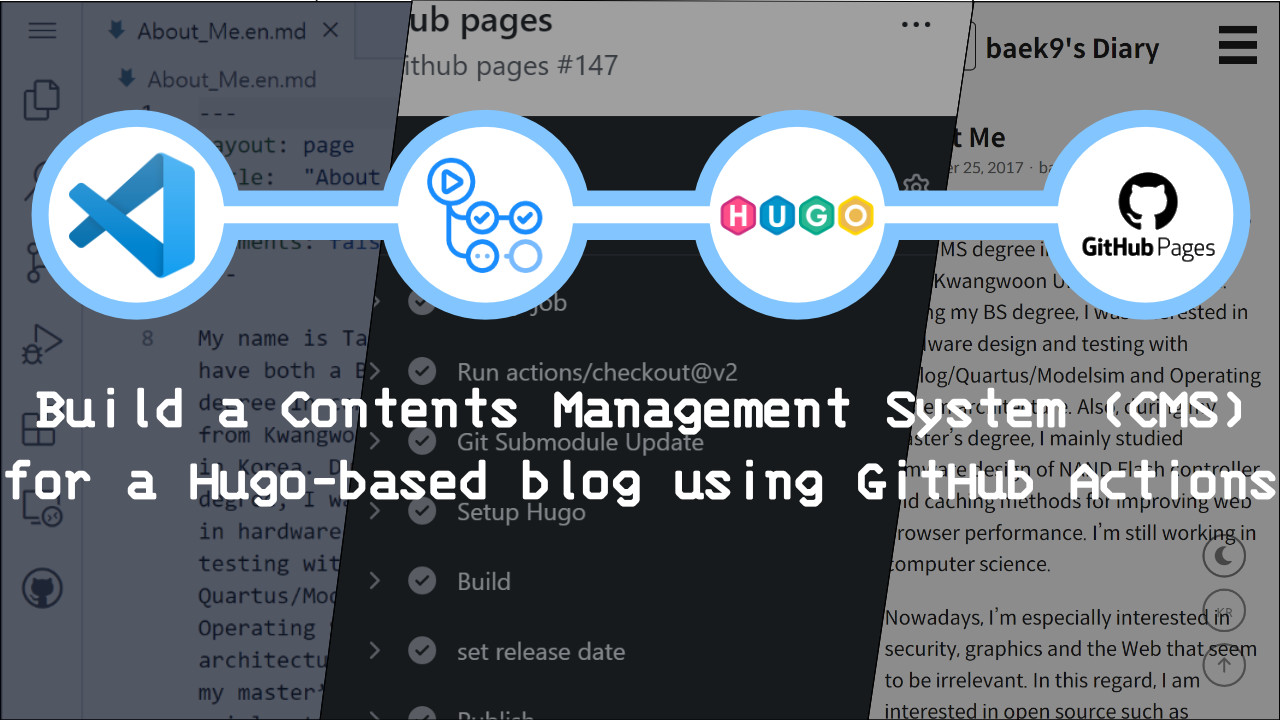
The same goes for Hugo. You cannot build a blog without Hugo installed beforehand. Of course, you can only write in the cafe and update the blog later. However, it seems difficult to say that an environment where writing and blog publishing are separated is an environment where you can focus on writing only. Wordpress or Medium are web-based. You can write and publish anytime, anywhere. In other words, the difference between Jekyll and Hugo from WordPress or Medium is the absence of a CMS (Content Management System). This post contains how to configure a system similar to CMS in Hugo-based blog operation.
GitHub Pages & Netlify 
I recently discovered a useful service that I didn’t know before while creating a blog. That’s Netlify. It is a service very similar to GitHub Pages. It is the same in that it builds and publishes static web sites made with Jekyll or Hugo. However, Netlify offers richer features, such as previews and linking to separate URLs. Netlify is paid, but it seems that you can use it for free, such as building and distributing a website and previewing it. However, note that the address of the distributed website takes the form of “[name].netlify.app”.
GitHub Pages and Netlify are good solutions that relieve some of the inconveniences I have felt in the past. This is because when a new article or a modified theme is pushed to the blog source code stored in the GitHub repository, it is automatically built and deployed. However, this method has two drawbacks for me.
It is impossible to split the source code
- Applicable only to a single repository where the article and blog source code are stored together. Therefore, as suggested in the previous article, it is not possible to separate the article and the website source code in a separate repository using the GitHub submodule. Also, since GitHub Pages and Netlify must be able to access the repository, the repository must be public. In GitHub, it is possible to set Private settings only in units of the repository, so at least my wish of making the posts stored in Markdown private cannot be fulfilled.
Distribution Control
- Even if an incomplete article is pushed to the repository, it is unconditionally distributed. Of course, you can tag unfinished articles as drafts so they won’t be included in your blog. However, it would be difficult if it was automatically distributed when incomplete modifications were made to various settings or themes of the blog. You can work on a separate branch and then merge it into the main branch, but it will be quite cumbersome.
Netlify CMS 
There is something called Netlify CMS. This seems to be a solution that perfectly solves the shortcomings of Jekyll and Hugo-absence of CMS- that were pointed out at the beginning. The Netlify CMS itself is free. However, I did not check whether the github repository must be connected to Netlify to be able to use it. If you do not mind disclosing the original image and articles in Markdown format, I recommend using this service.
Similar CMS usage scenarios 
For the same reasons as above, it is not enough to call it a CMS, but I found a useful method-I will call it a SCMS(an abbreviation for “Similar CMS”) later- and share the contents. This article assumes the splitting of the source code suggested in the previous article. In other words, after separating posts, themes, and websites into separate repositories in the blog source code, the post repositories are switched to a private state. Finally, if the user describes the process of writing and publishing, it is as follows.
- Writing
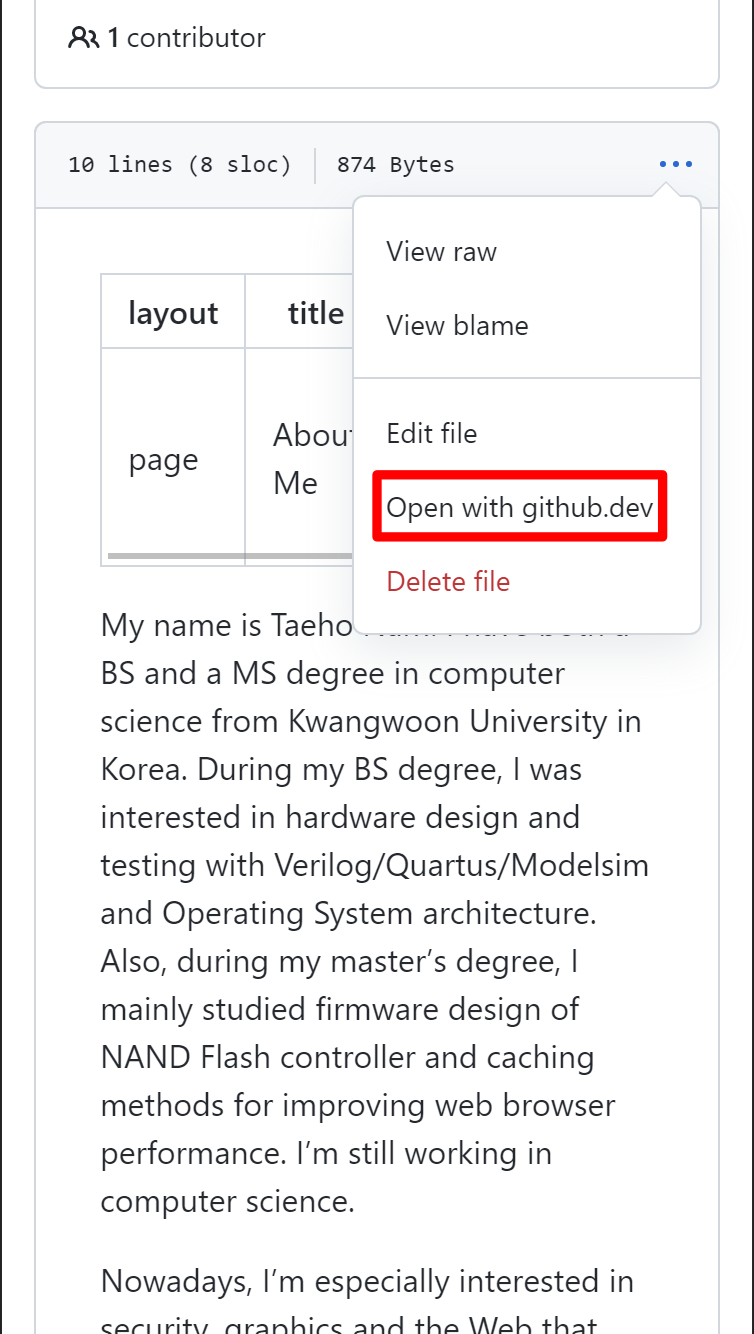
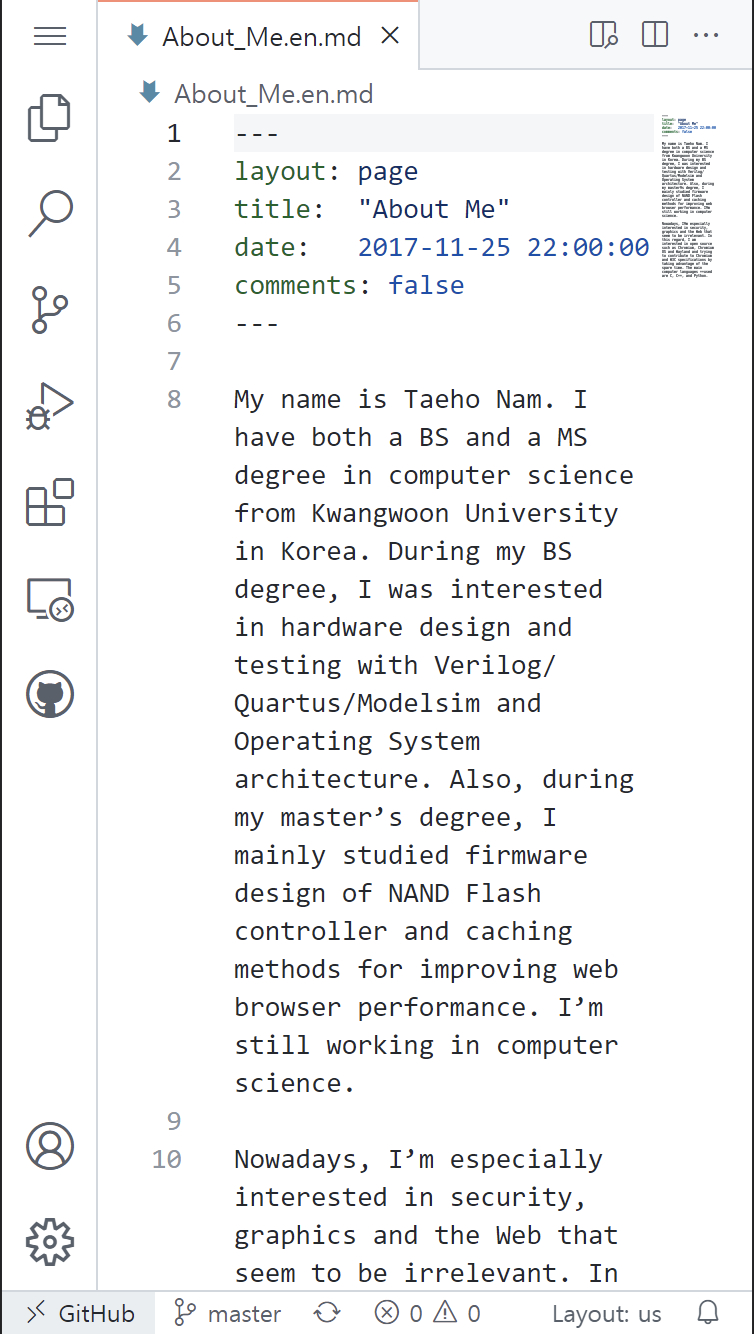
You can write with the default editor supported by GitHub itself. If you are uncomfortable, you can try an alternative product called prose.io. However, in addition to the default editor, GitHub supports a very popular editor on the web called VSCode! Compared to the desktop version, it provides features that are not lacking at all.
 |  |
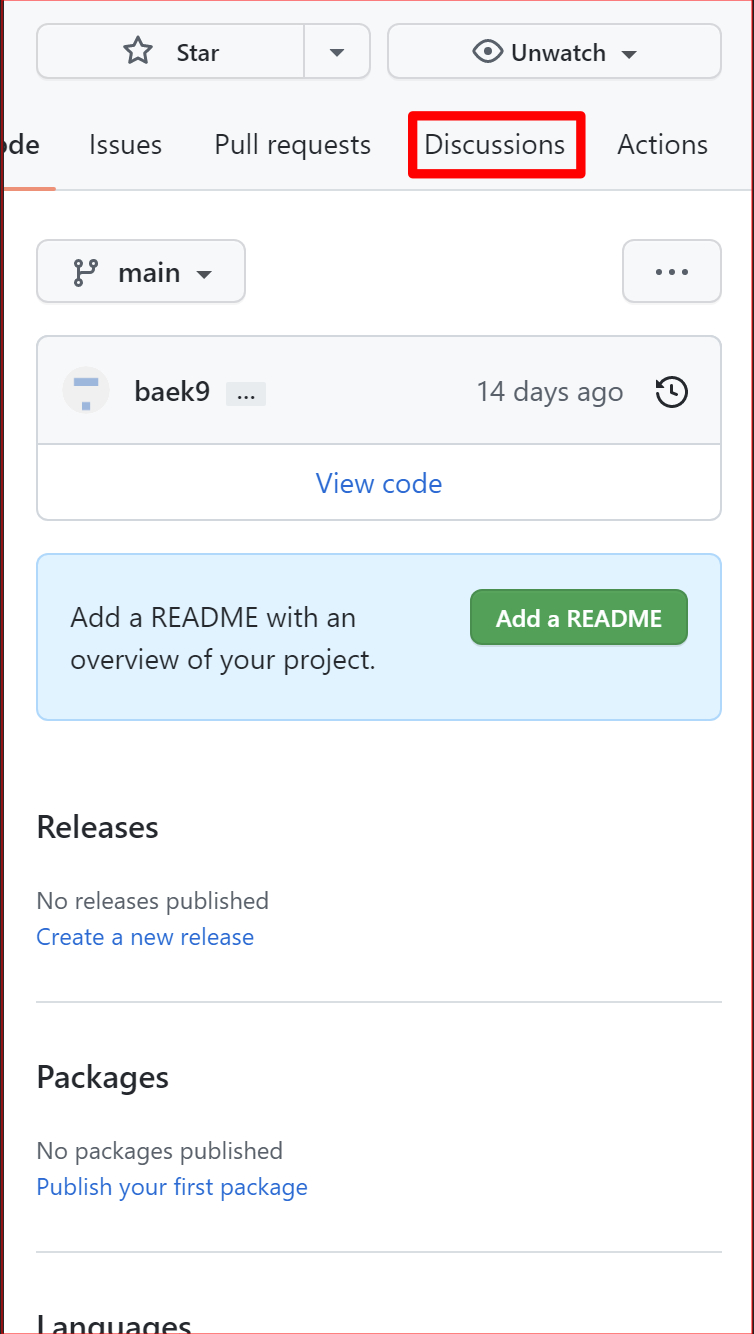
- Leave a short post on the GitHub Discussion tab
You pushed a post to the post repository, but the GitHub Pages doesn’t know about this. This is because the article, source code, theme, and website are all in separate repositories. Our SCMS uses GitHub Actions to GitHub Discussion will build the blog with all repositories the moment an article is posted. And it will cause the GitHub Pages to publish a new blog.
 | 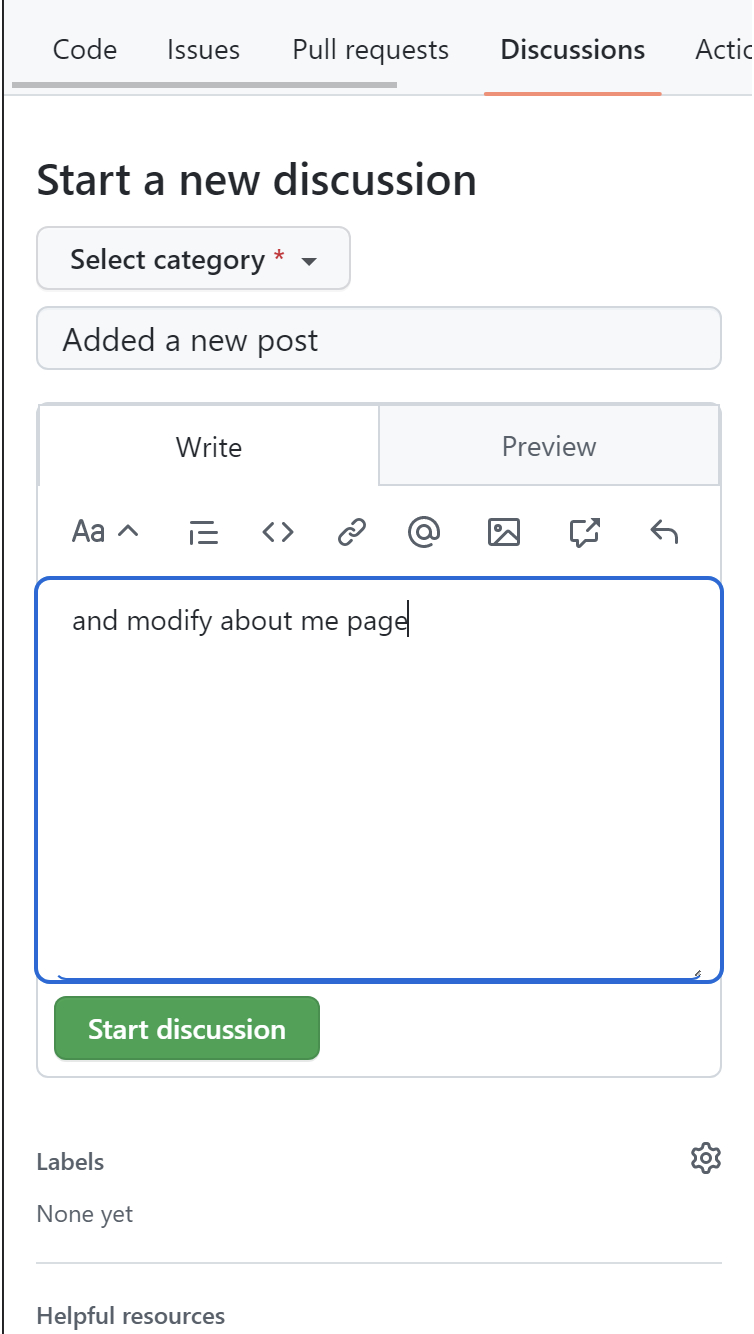 |  |
In the above scenario, the user writes with a web editor and simply leaves a short message in the Discussion tab. The content of a short article is irrelevant. However, the act of leaving a message itself operates the SCMS as a trigger. In this process, users do not need to know Git syntax, and even if the post repository is private, the blog is built and published. how about It’s not a CMS like WordPress, but doesn’t it seem like a pretty decent level of convenience? If you agree, we recommend that you read this article to the end.
How to build a full-fledged SCMS using GitHub Actions 
Step 2 of the scenario introduced above will be described. If the GitHub submodule was mainly used to split the source code in the previous article, this article will mainly use the GitHub action. GitHub Actions is one of many CI/CD (Continuous Integration)/(Continuous Deployment) tools to make DevOps a reality. DevOps is a compound word of development and operations, and is a comprehensive concept that means an environment or culture where development and operation harmonize together. The realization of DevOps inevitably requires automation, and in that respect CI/CD tools are particularly applicable to software products. GitHub Actions help you configure automated workflows. In the scenario, the action of leaving a short message in the discussion tab is defined as a trigger, and the workflow will be configured to automatically build and distribute the blog by this trigger. All of this is possible with a GitHub action.
Writing Action Scripts 
To configure the workflow we want with GitHub Actions, we need to write the same configuration diagram. That’s Action Script. In other words, it is the key to well-crafting action scripts. Action scripts are written in yml (Yaml) format. If you have used Hugo, you will be familiar with the syntax of yml and toml. Action scripts must be located in the source code repository and the path is fixed as “.github/workflows/”. The file name only needs to have an extension of yml, but in this article, it is set to “cms.yml”. I will now describe each section and item in “cms.yml”.
on section 
The on section and jobs section are essential for action scripts. The on section specifies the trigger of this action script. If you look at the code below, you can intuitively see that a trigger is defined when a new post is posted in the discussion tab, an existing post is edited, or a comment is posted.
on:
  discussion:
    types: [created, edited, answered]
jobs section 
This is a step-by-step listing of the workflow to be performed after a trigger has occurred. It consists of detailed steps of “Submodule Update”, “Setup Hugo”, “Build”, and “Publish”. First, let’s look at the part that says “uses: actions/checkout@v2”.
      - uses: actions/checkout@v2
        with:
          token: ${{ secrets.SECRETTOKEN }}
          submodules: true
          fetch-depth: 0
In GitHub Actions, you can also use action scripts written by others. The uses reserved word specifies that an action script called “actions/checkout” should be used. This action script is a script that helps you to use the contents of another repository when executing this workflow. We set the value of the submodule variable to “true” with the reserved word with because we need to use the github submodule to get articles and themes in a separate repository.
Meanwhile, a value of “secrets.SECRETTOKEN” is assigned to the token variable. Even GitHub Actions can’t access it because we have made the post repository private. To access, you need a token with access rights, which can be obtained from the GitHub homepage. It is possible to use the issued token as it is in the action script, but… . Then, the meaning of setting the post repository to private is lost. Therefore, an identifier is given to the corresponding token and the identifier is used in the action script. “SECRETTOKEN” is the identifier here. How to issue a key and give an identifier will be explained at the end of this article, so let’s skip ahead.
Step “Submodule Update” 
This is the first step in this workflow. Each step executes the shell script listed in the run reserved word. This step runs a shell script that updates the submodules to the latest one. Previously, submodules distributed in other repositories were imported with the “actions/checkout” action script, but these only point to a specific commit in each repository. Without this step, no new posts will be added to your blog.
      - name: Git Submodule Update
        run: |
          git pull --recurse-submodules
          git submodule update --remote --recursive
“Setup Hugo” step 
Steps to install Hugo to build Hugo. In this step, the action script called “peaceiris/actions-hugo” is executed with the reserved word uses rather than the run reserved word. Also featured on the official Hugo site, this action script installs the latest version of Hugo. Similarly, Jekyll and other tools have similar action scripts, so it is possible to apply a SCMS even if it is not Hugo.
      - name: Setup Hugo
        uses: peaceiris/actions-hugo@v2
        with:
          hugo-version: 'latest'
“Build” step 
With the source code, articles and themes, and Hugo installed, you can finally build your blog. Run Hugo and build it as we always do.
      - name: Build
        run: |
                    hugo --minify
Step “Publish” 
Now all that remains is to publish the built blog. The blog is located in the public directory, and since this directory is a separate repository, you need to push the whole newly built blog to that repository. At this time, I put the current date in a variable called “publish_date” and use it in the commit message. In fact, the commit message is written so that it is easy to understand which part has been changed. However, it is not possible to write arbitrary commit messages, as the current workflow must work automatically. Therefore, versioning was made possible by putting the build date in the commit message. At least, it can be seen that the previously written article and the revised source code have been reflected.
      - name: Publish
        run: |
          cd ./public
          git config --global user.email "baek9@blahblah.com"
          git config --global user.name "baek9"
          git add .
          echo "publish_date=$(date --rfc-3339=date)" >> ${GITHUB_ENV}
          git commit -am "${{ env.publish_date }}" || echo "No changes to commit"
          git push origin HEAD:main --force
Token Registration 
It’s almost over. Earlier, it was said that GitHub Actions require permission to access the post repository, which is a private repository. I will explain the token issuance part. A token is like a key that allows you to exercise a specified privilege. In other words, a key with permission to view the private post repository must be given to the GitHub action. The key can be issued in [Settings - Developer settings - Personal access tokens] after connecting to Github. Press the Generate new token button to start the key issuance procedure.
When generating a key, the Note item is where the identifier of the key is written. Let’s write “blogtoken” first. The key we will create has permission to access the private storage, so we have to be careful about leaks. Therefore, it is recommended to set the validity period of the key in the Expiration item. Below that are checkboxes that allow you to grant various privileges to the key. If you select `repo’, you will be given permission to access the private repository. Finally, click the ‘Generate token’ button to complete key generation. At this time, the key value shown on the screen must be copied. This is because it is the only point in time at which the key can be verified, so it is impossible to verify the corresponding key later.
The main point is to make the issued key available to the action script created. To do this, the key must be registered in the source code repository where the action script is located. In the [Settings - Secrets - Actions] menu of the repository, you can register all the secrets required in the workflow, including keys, such as passwords. Now, click the New repository secret button and paste the copied key into the Value field. And in the Name field, write the identifier to refer to the corresponding key in the action script. We have previously assigned an identifier to “SECRETTOKEN”. Oh, don’t use the key directly in hugo.yml without skipping this procedure because it’s cumbersome. If you don’t want to throw away the carefully written articles.
Create a GitHub Discussion 
GitHub Discussion is also a helpful feature for DevOps, which enables active communication and collaboration between stakeholders and customers, mainly around the repository. It is similar to a blog and seems to be designed to be mainly used for product-related Q&A and surveys. I used this GitHub Discussion as a trigger to run a SCMS. There are many predefined types of triggers. You can trigger when you want. For example, a push trigger triggers a workflow whenever it is pushed. If the pushed item is in progress, the blog or product containing the error will be built and distributed. If you set the GitHub Discussion as a trigger, you can trigger the workflow with an explicit action of writing or commenting. However, since the GitHub Discussion is an open space, anyone can trigger a workflow. I solved this problem by making the source code repository private as well. Fortunately, it was possible because the theme itself was MIT License. Of course, even a license that is obligated to disclose can be circumvented by creating another workflow that pushes the latest source code to a separate public repository.
Finishing 
Up to this point, the process of building a SCMS has been completed. It’s long and complicated, but if you’ve followed the above steps perfectly, you’ll be able to write and publish comfortably on your phone or pad.